

Breadcrumb Trail Links
Published on March 21, 2023 • 3 minutes reading time
 Sidney Crosby #87 of Canada celebrates with teammate Scott Niedermayer #27 after Crosby scored the deciding goal in overtime in the ice hockey men’s gold medal game between the USA and Canada on day 17 of the Vancouver 2010 Winter Olympics at Canada Hockey Place in February scored February 28, 2010 in Vancouver, Canada. Photo by ALEX LIVESEY /Postmedia Network
article content
One of the greatest goals in Canada’s Olympic history was that of Sydney Crosby at the Vancouver 2010 Winter Olympics.
advertising 2
This ad has not yet loaded, but your article continues below.
article content
In a 2-2 draw against an equally top-flight American team, the game went into overtime and at 7:40 Crosby scored what was considered the golden goal from that point onwards – the goal that Canada posted yet again the pinnacle of ice hockey supremacy.
It was a great goal and the photo of Crosby celebrating moments later is instantly recognizable to most hockey fans. But the man who won the battle for the puck in the corner, the workhorse who made the goal possible and who passed the puck to Crosby, who stood at the side of the net, was Jarome Iginla. A great goal for sure, but a really great assist.
Which brings us to today’s topic: the value of using products like Glue Assist when installing parquet and solid wood floors and more generally glues and the recommended adhesives for all your flooring needs. Basically, I’ve come to realize that the only way to install a floor is to nail it down, glue it down or, like ceramic tile, cement it in place.
article content
advertising 3
This ad has not yet loaded, but your article continues below.
article content
Floating floors of the “Click” type should be easy to install and the planks must not detach from one another. Realistically, the click mechanisms are often a frustrating exercise with the planks eventually coming loose.
How about a luxury vinyl plank that claims to be able to be installed and positioned directly onto a subfloor without the use of glue and is simply held in place with two-way tape around the perimeter? Well, this type of install might do the trick for a while, until you actually start moving things around and generating a bit of traffic.
All we can tell you as a flooring retailer is that 95 percent of the complaints come from those who have installed the thinner economy class floating floors. So, whenever possible, take the support and tape it in place.
advertising 4
This ad has not yet loaded, but your article continues below.
article content
-
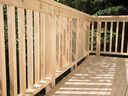
DIY Tips: Your deck’s posts must pass inspection
-
DIY Tips: Choosing the right railing is important
-
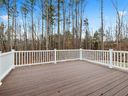
Do-it-yourself tips: Composite decking is not entirely maintenance-free
Traditionally, hardwood floors are nailed down. Traditionally, however, hardwood flooring consisted of simple planks 2.25 or 3.25 inches wide. In general, the narrower the piece of wood, the less likely that hardwood plank will shrink or buckle (where the center or sides of the plank stick up).
Today, most new build homeowners choose solid and/or engineered planks between 4.25 inches and 8.25 inches wide. This is a wide surface that can be held in a stable position by simply inserting a clamp about every 20 to 10 inches on either side of the board.
advertising 5
This ad has not yet loaded, but your article continues below.
article content
As humidity levels in a home fluctuate from season to season, and room temperature fluctuates because windows let in too much sunlight, or even because a wood or gas stove is on, these wider planks will be stressed. When wood is stressed, it wants to move, even if they are engineered materials.
So, for solid or engineered hardwood floors that are 4.25″ wide and 4.25″ wide, look for the Glue Assist product or an equivalent floor adhesive as recommended by your hardwood floor vendor.
How is the glue applied? As with most wood glue methods, you draw a no-frills line down the back of the hardwood board, press it into place with your full body weight, and then insert the staples. For the luxury vinyl planks, you must first apply the adhesive to the subfloor and wait for the adhesive to become tacky (about 20 minutes). Then you have to position the planks.
The great advantage of luxury vinyl floors is that the tiles have a square edge, so there is no clicking. The fact that it’s glued gives it a huge advantage.
We installed it in our showroom, taped down of course, and we cart over it and wipe it down all day with no problem. So we’re pretty confident that the glued down version of this vinyl floor will stand up to any domestic environment you can throw at it.
Therefore, if you want to install it on your floor, stick it on.
good building
Share this article on your social network
Comments
Postmedia strives to maintain a vibrant but civil discussion forum and encourages all readers to voice their views on our articles. It can take up to an hour for comments to be moderated before they appear on the site. We ask that you keep your comments relevant and respectful. We’ve turned on email notifications – you’ll now receive an email when you get a reply to your comment, there’s an update to a comment thread you follow, or when a user you follow makes a comment. For more information and details on how to customize your email settings, see our Community Guidelines.
Join the conversation
advertising 1
This ad has not yet loaded, but your article continues below.


